The Stern-Tie Setup

A version of this article was first published on the July/Aug 2019 issue of Small Craft Advisor Magazine.
This is a popular post. It must have some value. Please consider a donation to help keep it available for reference and future consumption. Thank you.
PayPal or Zelle: wheelersf@hotmail.com
“How do you run a stern-tie setup when you have limited working and storage space on board?” This is one of the questions I asked myself in fitting out my Flicka 20, Sampaguita, for Pacific Northwest expeditions. First, I’ll address what a stern-tie is, why you might need one, and the equipment involved. Second, I’ll review the specific issues I faced as a small boat owner and how I personally solved those challenges. Third, I’ll discuss how this solution and its variables works for Sampaguita in real-world practice.
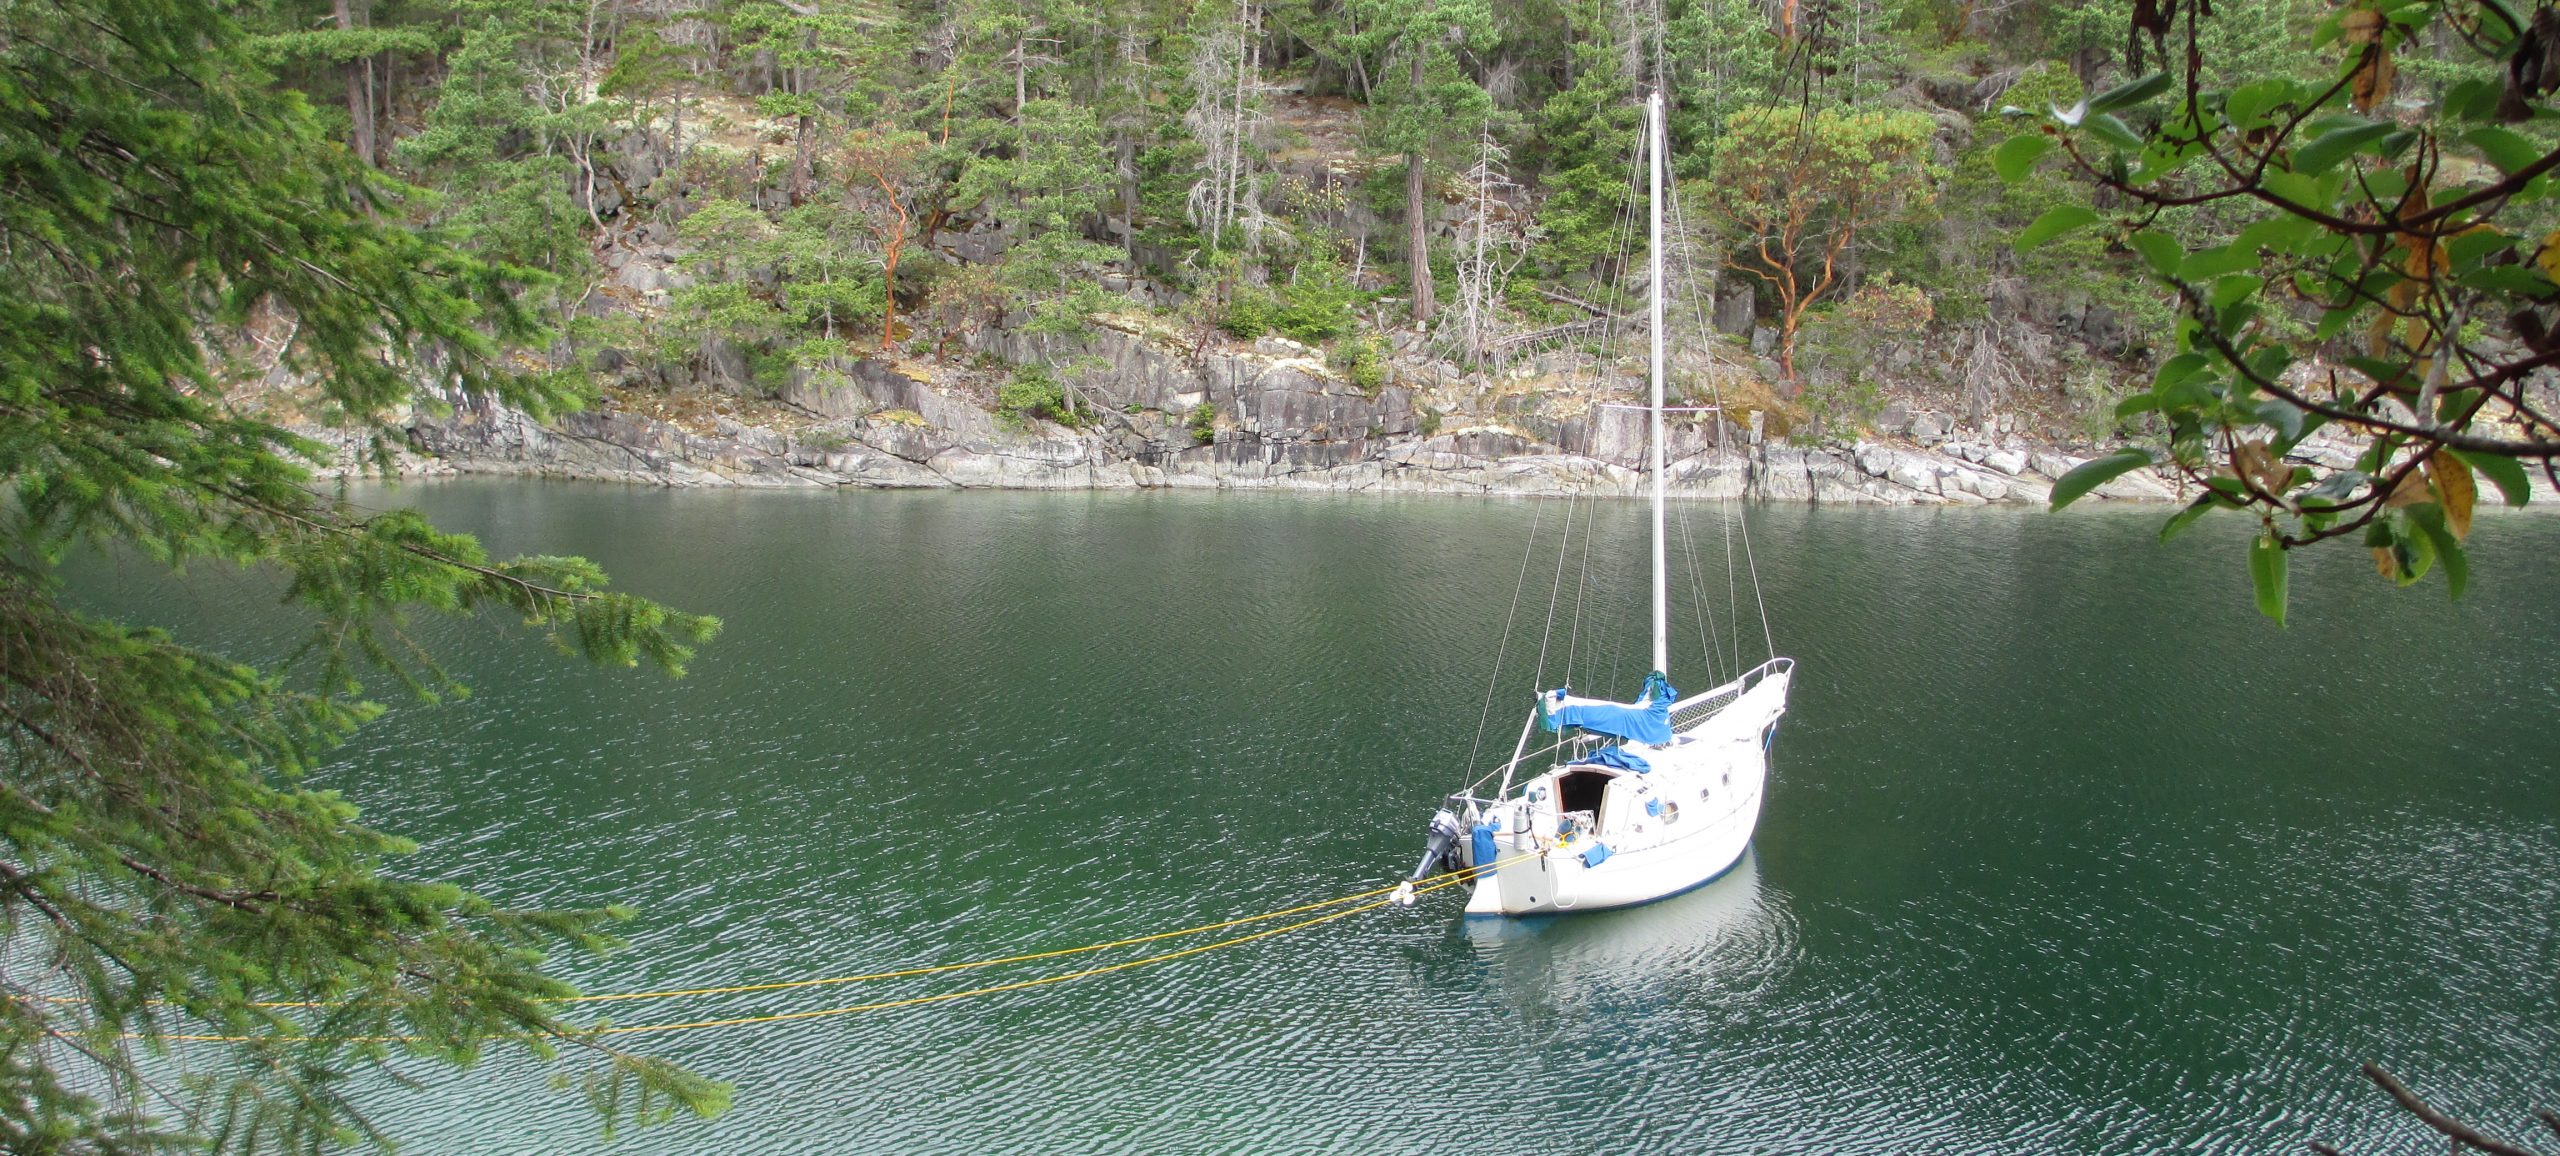
A stern-tie is a line leading from the stern of a boat to an object on shore. This could be a tree, a rock, or piling. In Washington State Parks and British Columbia Provincial Parks, you will often find rings, chains or posts installed for this purpose. When used in conjunction with a bow anchor, the line holds a boat in a particular place or aids in the security of the bow anchor.
In the Pacific Northwest, there are many beautiful coves and inlets to attract you to anchor for the night. Sometimes you need a place to wait for the weather or a tidal rapid to settle. You might have run out of navigable light, or are too exhausted to sail on. Once in the anchorage, the seabed may have a steep sloping bottom or be of poor holding ground for the anchor. Sometimes there is limited room because of rocks or other boats in your swing circle and in some anchorages, it is just considered polite to reduce your swinging radius to leave room for later arrivals. So, you see, a stern-tie setup can be necessary for safety, security, and etiquette.
I will limit the equipment focus to only the stern-tie setup including the line, a reel, and chafe protection. The materials used and the working and storage space will be considered. Not included are the bow anchor and the tender. While both are necessary for stern tying, they will serve you in other situations and are considered prerequisite acquisitions. Each presents problem-solving challenges which could be articles of their own.
In the search for my own stern-tie solution, my first step was to purchase 300 feet of 3/8”, 3-strand, yellow, polypropylene rope. This would give me an adequate length to lead to shore and then back to the boat. An advantage of going in a full circle like this is that polypropylene line hitches on the cleat better than it ties into knots. However, the biggest reason is when departing there is no need to leave the boat to untie the line. Just release the line from the cleat and reel it in.
I chose 3/8” diameter line because this size would provide adequate strength for my anticipated loads and 3-strand because of its lower cost. The choice of yellow, and polypropylene, was due to safety. The yellow would provide high visibility so other boaters would see it. Polypropylene, because it floats, aids visibility and offers the best property to avoid accidentally wrapping the line around my outboard’s propeller.
The crux to the working and storage space consideration is the reel. On my Flicka, the rudder is transom hung and occupies the mid-section of the transom. The outboard engine is mounted to port of the rudder. To starboard, hung on the stern rail, is the propane tank. The stern light is also located here. On a Flicka, the mainsheet traveler is the stern rail, and Sampaguita has dual backstays. Furthermore, I stow my fenders on the starboard rail and my stern anchor and reserve fuel on the port side. With all this other necessary gear, there is not much room for a permanent, traditional style line reel.
At first, I tried to do without a reel, coiling up the line and storing it in the cockpit locker. This addressed the working and storage space issue, but 300 feet of 3-strand polypropylene can be unruly and tangle easily. This caused problems with deployment and retrieval and took too much time. Research uncovered options like garden hose reels (too bulky) and beautifully crafted stainless steel reels (too expensive AND too bulky). Neither offered the simple, economical and flexible solution that suited my single-handing style and my small boat.
Then, I had an idea. I went to the marine store and inquired if they had any empty rope spools. They had many; I was offered a choice and opted for a weather resistant plastic one. I searched my stash of nuts, bolts, and washers, finding a combination to build a handle to wind in the line. I drilled a 3/8” hole through the outer edge of what would be the top side of my reel. I fed a 3/8” X 6” fully threaded bolt up through the hole, added large fender washers to both sides and finally a nut to tighten it down. What I had on hand was mild steel, and after 4 years it is showing some rust. If you want greater style, cost and corrosion resistance, go for all stainless steel. As a final touch, I sleeved the bolt with a piece of 3/8” I.D. plastic hose to protect my hands from the threads.
Next, I found a piece of lumber from my marina’s refuse pile that could be a post for the spool to spin on. I whittled down one end to fit tightly into Sampaguita’s sheet winch ratchet socket. I cut the piece to a length that, once installed in the ratchet socket and the spool added, it would extend only an inch or so above the reel. I made two, in case one broke. Finally, I tied one end of the line to the spool and wound up its entire length.
Chafe protection was added to the working end of the stern line. This was a spiral cut segment of old water hose, followed by a small float and a stopper knot. The line needs protection from chafe regardless of what its tied to. If a tree is used and unprotected, the line will cut through the bark. This is a great reason to use chains, rings, and posts if they are available. As the line is reeled in, the chafe guard remains in place while the rope runs through it. The small float then “gathers” the guard at the end, bringing everything back to the boat.
When the stern-tie set up is not in use, it is stored under the v-berth. This location is the best out-of-the-way space on my Flicka roomy enough to accommodate the spool. Additionally, it keeps the polypropylene line, which is highly susceptible to UV degradation, hidden from the sun.
Is this a simple, inexpensive and flexible solution that works? I found it to be. It does require forethought when approaching an anchorage and a stern-tie is anticipated. With storage areas on my small boat, I need to move something to get to something. Collecting the setup from the v-berth is no exception. If the kayak is not in tow, that will need to be inflated. As I choose an anchor spot, I also survey the shore for an appropriate object for a stern-tie. Once the bow anchor is set, the post goes on the winch, the spool is added, and I paddle the line ashore and back. I hitch the line where it leaves and returns to the boat, and the reel is not under load.
When departing, the line is released and wound in. The location is easy to access, and the post doesn’t inhibit rotation. After it is reeled in, I move on to weighing the bow anchor. Once underway, I return the stern-tie set up to storage. When I have access to a freshwater hose, I rinse the line and reel to remove any salt and grime. A good rain will work for this too.
I have tried some variations of implementation. One, inflating the kayak in route to the anchorage. This was awkward on Sampaguita’s small deck, but possible in mild weather. For another, I temporarily dropped a stern anchor over the side after the bow anchor was set. This kept the boat in position while I inflated the kayak. A stern anchor can also be useful when taking the line ashore to keep the boat from swinging to the wind and current. Speaking of these, consider them as well as potential future shifts. Strong cross winds can apply heavy loads on lines and hardware, much more than would occur if swinging to just a bow anchor. Likewise for currents, which in tidal areas may reverse or swirl. While winding in my line, I have gotten the float caught in the rocks. This necessitated kayaking ashore to unhook it, defeating the point of the full circle. It is also nearly impossible to reset the bow anchor once stern tied. Releasing the line and starting over is likely the best option. You may note, these variables can happen regardless of the answer for the stern-tie setup.
Each sailor, for each boat, will have their own variation on the stern-tie setup that best accommodates them. A smaller boat may present more challenges concerning working and storage space and require creative and unorthodox solutions. I offered a solution that has worked for me and my Flicka. If it works for another boat, in part or in whole, or inspires a different creative solution, I will be satisfied. For people who want to have big adventures on small boats and budgets, The Resourceful Sailor hopes to give ideas on how to make this happen. Remember, keep your solutions prudent, safe and have a blast.
Discover more from Sailing With Josh
Subscribe to get the latest posts sent to your email.


Wow, another great idea from the mind of Josh! I want to replicate your stern tie setup for my Laguna 26. Do you have a closeup picture of the post you fabricated to attach the spool to the winch? I can’t see the bottom of the spool in the video. Thanks for that and for inspiring me to follow in your wake one day.
Jay
LikeLike
Don’t over think the post. It’s just widdled wood jammed in the winch. You can likely do better. Thanks for reading.
LikeLike
Hi Josh ! Im Cris, huges for you sailor! See you in Chile !
LikeLike
Thanks Cris. See you!
LikeLike